Crafting a Cozy Fall Lap Quilt: Simple Techniques, Color Inspiration, and Design Tips
I absolutely love fall and everything about the season, especially the cozy crafts that come with it—sewing being my favorite! From warm color palettes to creating homemade gifts, fall is the perfect time to let creativity flow. In this post, I’ll share how I made a simple yet charming Fall Lap Quilt, perfect for bringing the warmth and beauty of autumn into your home. Whether you're a seasoned quilter or just dusting off your sewing machine, I hope this inspires you to embrace the season and craft something special.

Embracing Autumn with a Cozy Fall Lap Quilt
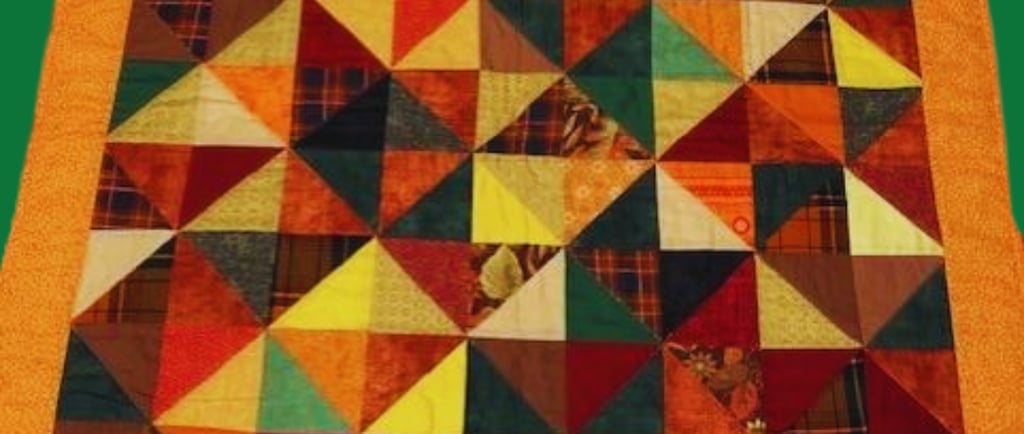
What time of the year has the brightest and best feel-good colors? If you said Autumn, here’s a high five to you! There’s something about the rich palette of oranges, yellows, and everything in between that truly puts a pep in your step. As the season transitions to cooler, breezy days, we’re enveloped in a sense of cozy comfort. With this in mind, I set out to create a fall lap quilt that embodies those same warm, comforting feelings. I didn’t need to purchase extra fabric for this project—like many of us who sew, I had a collection of fall fabrics already on hand. This quilt is perfect for anyone with a stash of scrap materials or fabric in autumnal hues, making it an ideal project for repurposing and celebrating the season’s charm.
Crafting a Cozy Fall Quilt: Simple Steps and Inspiration
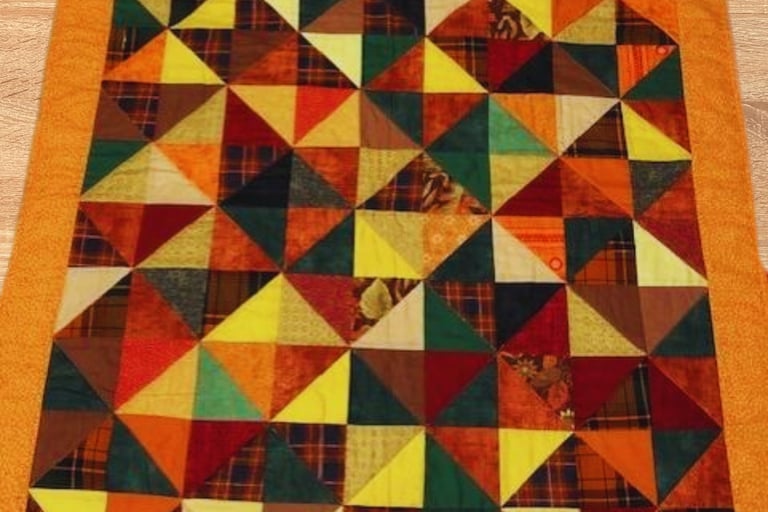
Now, I'm not an advanced quilt maker and don’t have all the tools for fancy designs. My go-to quilting technique is stitch in the ditch, and I’m still learning free motion quilting. But that shouldn't deter anyone from diving into quilt-making. If you’ve never made a quilt before and can operate a basic sewing machine, just jump in! Maybe a lovely winter-colored quilt will be your next project. I hope this fall lap quilt inspires you to start. Don’t worry about the size—it’s a lap quilt, so it’s quicker to finish than a bed-sized quilt. You can either complete it in no time or take it at your own pace. I didn’t use a pattern; I was inspired by a picture and decided to create a fall quilt with half squares arranged in a diamond pattern. I used 5.5" squares, but you can choose any size you like. Lap quilts typically range from 36" x 36" to 54" x 60". Mine is 36" x 42", a perfect size for snuggling up with a warm beverage and a good book. It’s also ideal for displaying as fall decor—drape it over a chair or sofa, hang it on a rack, or use the blocks to create a table runner. The possibilities are endless!
Finding Fall Color Inspiration
Let’s circle back to the beauty of fall colors. The fall palette is what truly evokes the essence of the season, whether you’re drawn to vibrant hues or more muted tones. I’ve even seen a soft light teal used in some fall color schemes, adding a unique twist to traditional autumn shades. If you’re in need of inspiration for your own palette, visit your local hardware store for free paint color swatches and sample books. Not only are these resources free, but they’re also portable—perfect for bringing along to your local fabric shop to match fabrics with your chosen hues. I won’t include the hex codes here, but I’ll mention the colors to give you an idea of various combinations. There are so many fall color combinations to choose from, and this is just a small selection to get you started. Let these colors guide you in choosing fabrics and creating a quilt that captures the spirit of fall beautifully.


Warm Earth Tones
Rustic Farmhouse
Cozy Cottage
Spiced Shades
Autumn Color Palettes
Designing and Assembling Your Fall Lap Quilt
The size of your quilt will determine the number of blocks you'll need. For my fall lap quilt, I used three blocks across, each roughly 10 to 11 inches in size. I can’t recall the exact dimensions, but three blocks came out to about 30 inches wide, with 3-inch borders on each side. I used a 1/4 inch seam allowance and had to square up the quilt, but in the end, with the binding, it measured 36 inches by 45 inches.
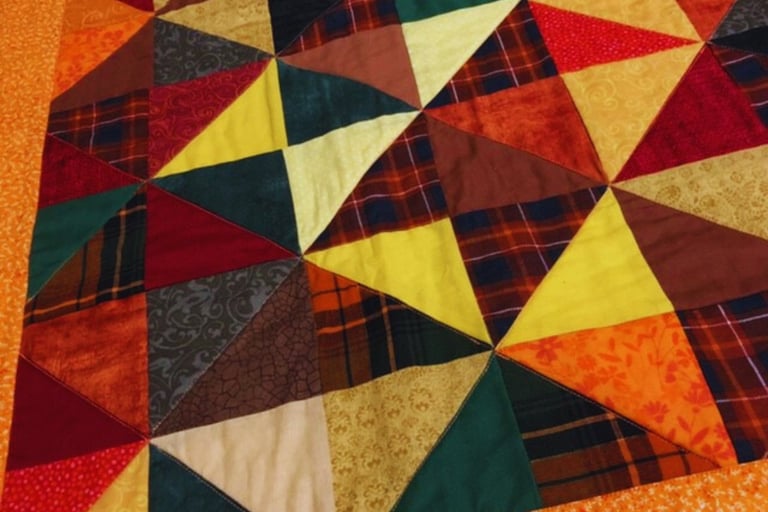
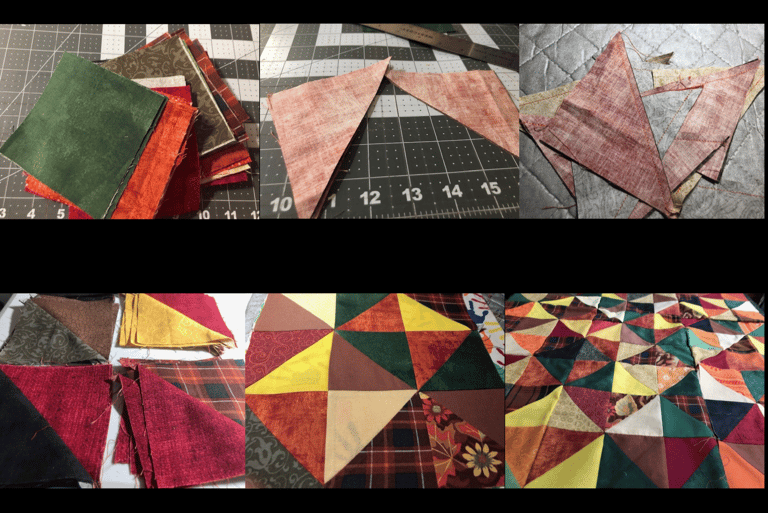
To give you an idea of the process, I’ve included some pictures showing the steps I took. I cut 5.5-inch squares, split them in half, and then carefully planned how I wanted them arranged. There might be more efficient methods for mixing colors and patterns, but I opted for a layout that avoided too much duplication. Take your time to experiment with block placement; I used nine 5-inch squares to make one quilt block. Since I aimed for a diamond shape, I rotated the blocks to achieve my desired design before sewing them together. The beauty of half-square triangles lies in their versatility—your design possibilities are endless. Feel free to explore and have fun with the patterns you create. Check out the pictures below for a visual guide and inspiration!

A Note on Quilting Inspiration
I want to clarify that this isn’t a step-by-step guide to quilt making; it’s simply a glimpse into my lap quilt project to spark your creativity. If I can do it, so can you! Has your sewing machine been gathering dust in the closet? It’s time to blow off those dust bunnies and give this project a try. Part of the joy in quilting is not only in the creation but also in sharing the finished piece with others. I truly love giving homemade gifts, infusing each one with care, time, and a lot of love (and yes, a bit of laughter too). Alright, I’ve finished my pep talk—now back to the project!
Adding the Finishing Touches to Your Fall Lap Quilt
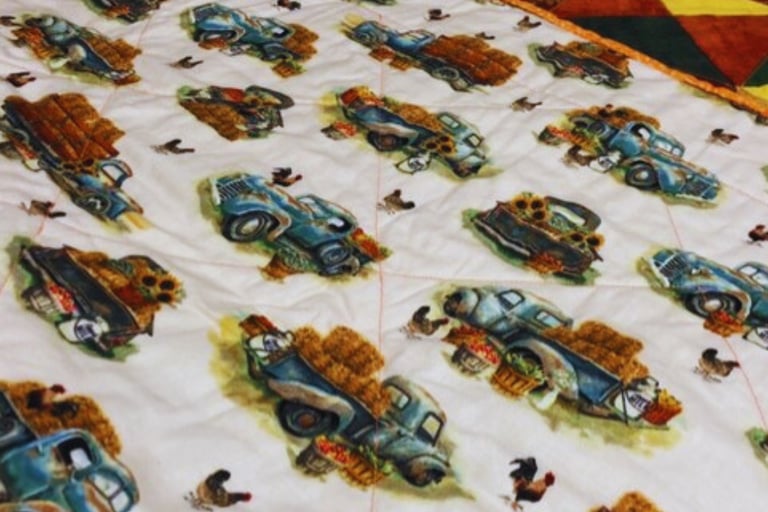
After finishing the quilt top, I added a 3-inch border to frame the blocks, as I mentioned earlier. I made sure the blocks were straight before attaching the border, choosing a pumpkin orange color to tie the whole design together. For the quilt’s backing, I picked a fabric that featured a charming antique harvest truck scene, which repeated across the material. You could easily flip it for a different look, but of course, the choice is entirely yours—you could opt for solid colors or something else that complements your quilt. If your quilt is larger than the backing fabric, no problem! You can sew pieces together to create a larger backing, making it as unique as the top.
Of course, you’ll need to add batting between the top and backing layers. I prefer cotton batting—it’s lightweight, breathable, and perfect for all seasons, keeping things nice and toasty. However, there are many types of batting to choose from. If you decide to go with a thicker batting, you’ll need a walking foot to help feed it through your machine smoothly. If your machine comes with one, definitely use it! To keep everything together, I like to use a light adhesive spray, applying it to the batting only. If you don’t have adhesive spray for quilting or basting, safety pins work just as well to hold the layers in place.
Wrapping Up the Fall Lap Quilt
After assembling my quilt sandwich (yes, that’s what we call it, lol), I finished it by stitching along the lines—straight diamonds, in this case. I followed the diamond pattern, then squared up the quilt and added the binding to the edges. This was such an enjoyable project that I ended up using the remaining fabric to create a beautiful, large patchwork quilt of my own design. With the weather slowly cooling down, I can’t wait for the brisk winds and rustling leaves of autumn to arrive. For now, this Fall Lap Quilt is enough to bring those cozy memories and feelings to life. I hope this project inspires you to create your own! While you are getting ready to nestle under your toasty Fall Lap Quilt , Check out one of the warm, comforting soups to get you even warmer.
