
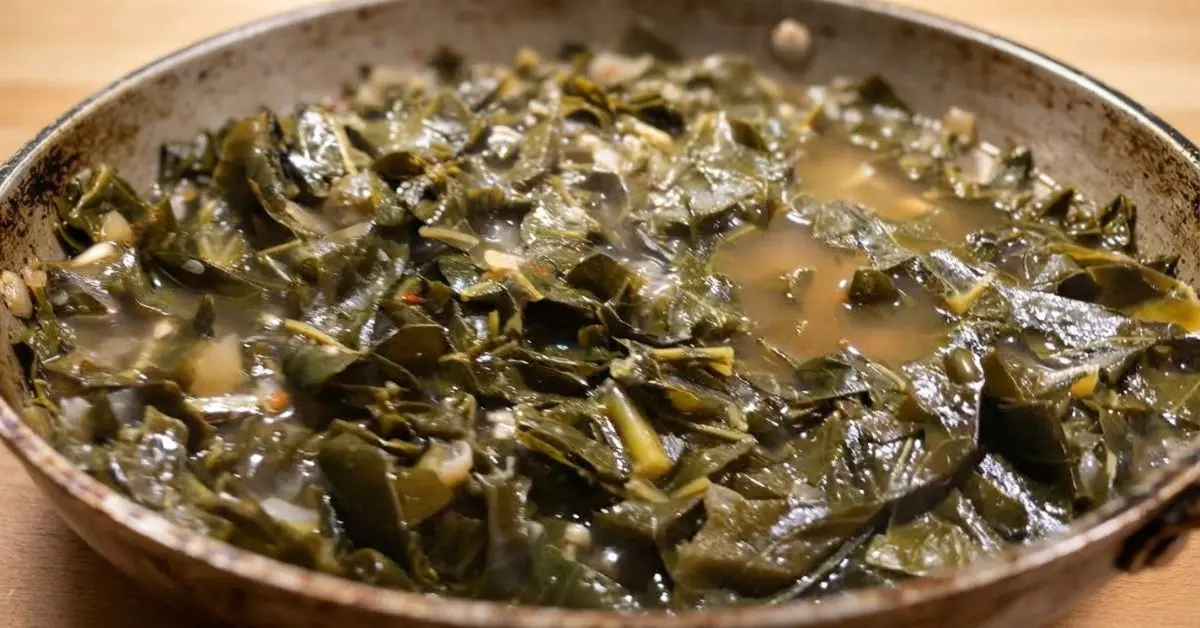
Meatless Collard Greens That Don’t Skimp on Flavor
🕒 Prep: 15 mins | 🍲 Cook: 45 mins | 🍽️ Serves: 6
✨ Made in Dana's kitchen for tender, flavorful collard greens that bring plenty of good ole pot likker to the table.
Collards are a big hit no matter what time of year it is, and traditionally, a good pot of Southern collard greens usually involves some kind of smoked meat for flavor. But there are days when you want to leave the meat out without leaving the flavor behind.
That’s exactly what these meatless collard greens are all about. They’re packed with layers of savory, smoky flavor that come together beautifully. The result is a tender, flavorful pot of greens that won’t have you sitting there wondering, “Where’s the beef(meat)?”
Sorry, Wendy’s. I had to do it. 😂
And let me tell you, I’m not talking about collards that are simply cooked until they wilt. I like my collards tender, well-seasoned, and full of flavor, with plenty of that good pot likker to spoon over the greens. So when I set out to make a meatless version, I knew I couldn’t just leave the meat out and call it a day. I needed to build the flavor from the ground up.
Building Layers of Rich, Smoky Flavor Without the Meat
After making this version, I can honestly say I didn’t miss the meat at all. By leaning into aromatic vegetables, rich vegetable stock, and a careful blend of spices, you get all that deep, traditional character right on the stovetop.
So let's grab a heavy-bottomed pot and get these greens simmering...
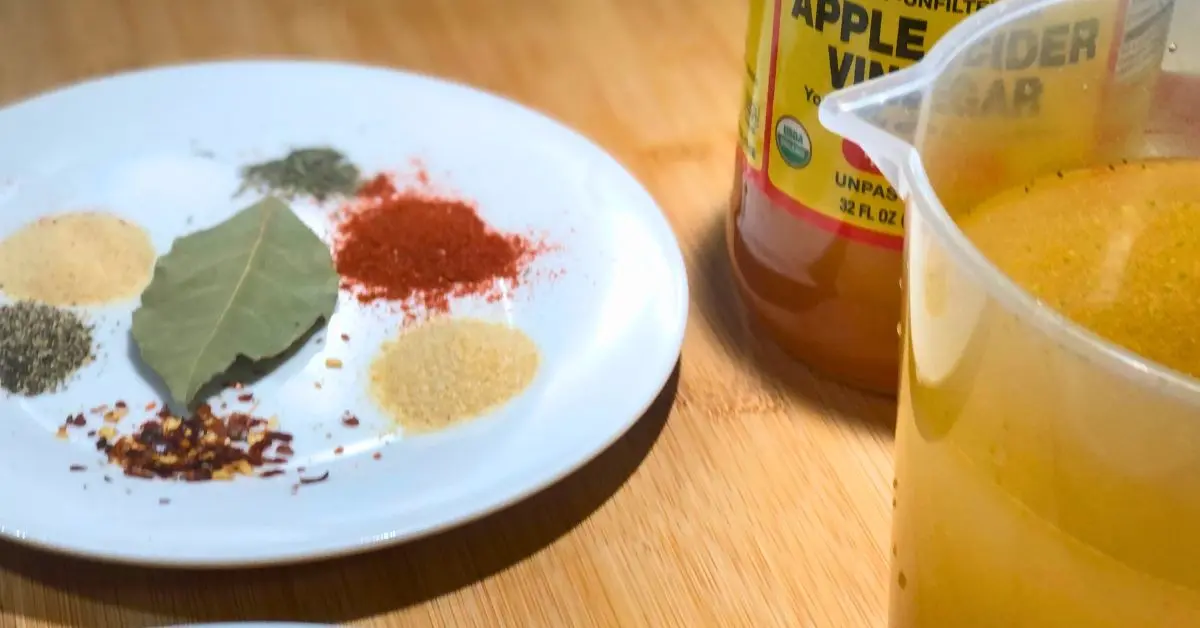
Ingredients for Meatless Collard Greens
While many of the ingredients in this recipe are probably familiar if you’ve made collards before, there are a few things I pay particular attention to when I’m making them without meat. Since we aren’t relying on smoked meat to build the flavor, I like to layer the seasoning so every part of the pot brings something to the table.
Collard Greens
For this type of collard greens, I prefer younger greens when I can find them. They tend to be lighter in color, more tender, and less bitter than larger, mature leaves. They also cook a little faster, which is a bonus.
That said, collard greens can vary quite a bit from bunch to bunch. Some are tender and cook down quickly, while others need more time. Don’t get too caught up in the clock. The greens are done when they reach the tenderness you like.
Aromatics
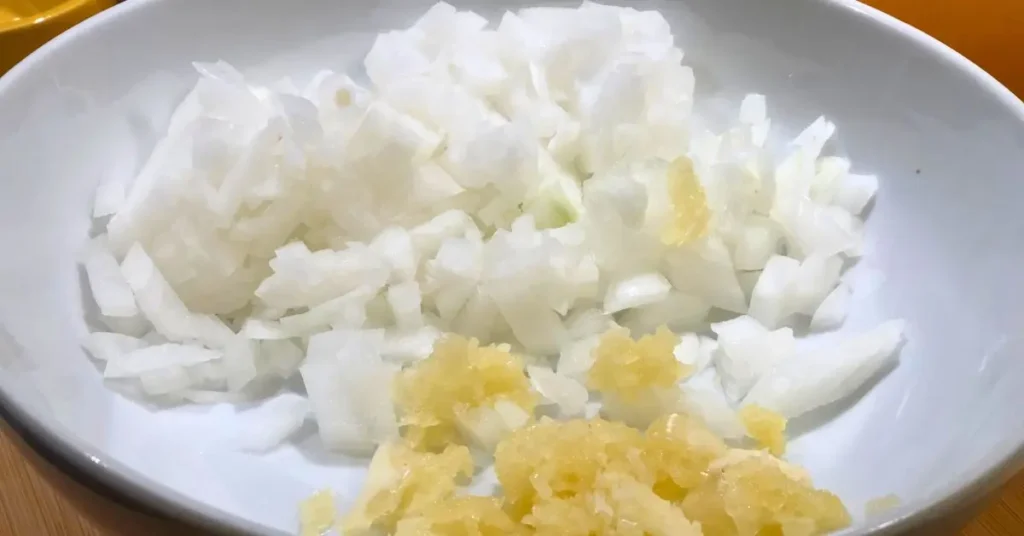
I use plenty of finely diced onion and lots of garlic. I prefer yellow or sweet onion here, and I dice it fairly small so it becomes part of the flavor of the greens rather than big pieces competing with them.
And yes, I said lots of garlic. 😂
Seasonings
I like to layer the onion and garlic flavor with a little onion powder and garlic powder. You don't need a lot. They’re there to reinforce the aromatics and add another layer of savory flavor.
A small amount of dried thyme goes in as well. Just enough that you won't really know it's there, but you'll miss it if it isn't.
I also add a large bay leaf while the greens simmer. It quietly adds another layer of flavor to the pot likker.
Smoked Paprika
Since we're leaving the smoked meat out, I use a little smoked paprika for depth. Don't worry, it won't turn your collards into a smoky dish. I use just enough to give the broth that little something extra.
You know that flavorful pot likker you want to sip from the spoon?
That's what I'm after.
Apple Cider Vinegar
I like to finish my greens with apple cider vinegar. It brightens everything up without taking over the dish.
If you love your collards on the vinegary side, by all means, add more. I prefer mine balanced rather than strongly tangy, so I start with a little and adjust from there.
Sugar
A little sugar helps balance the bitterness of the greens. How much you need can depend on the greens themselves. If you've picked up a particularly bitter bunch, you may want a little more.
The goal isn't to make sweet collards. It's simply there to round out the flavor.
Worcestershire Sauce
Now this is one of my favorite additions.
Worcestershire sauce brings that deep, savory umami flavor that is especially helpful when you're making collards without meat. I love the flavor, so I use a little more in my pot, but I recommend starting small.
Let the greens cook, taste the pot likker, and add more if you think it needs it. It's much easier to build that flavor than to try to correct it after you've added too much.
Vegetable Broth
The broth is a big one because it becomes your pot likker.
When I'm making these meatless collards, I love using a really good vegetable stock. It gives the greens a rich foundation without adding meat.
But don't feel like you have to use vegetable stock. Chicken stock works beautifully if you're not trying to keep the recipe vegetarian, and you can also use your favorite broth powder or seasoning base. The important thing is to start with a broth you already enjoy because that's going to become part of the finished flavor.
Red Pepper Flakes
And, of course, I need a little heat. 😂
Red pepper flakes go right into the pot while the greens are cooking. They slowly infuse the broth and greens with a gentle warmth instead of giving you one big hit of heat at the end. I like to add my red pepper flakes right in with the onions and garlic while they sauté. Cooking them in the oil helps wake up the pepper and gives the greens a deeper, more infused heat.
Use as much or as little as you like. I like mine with a little kick.
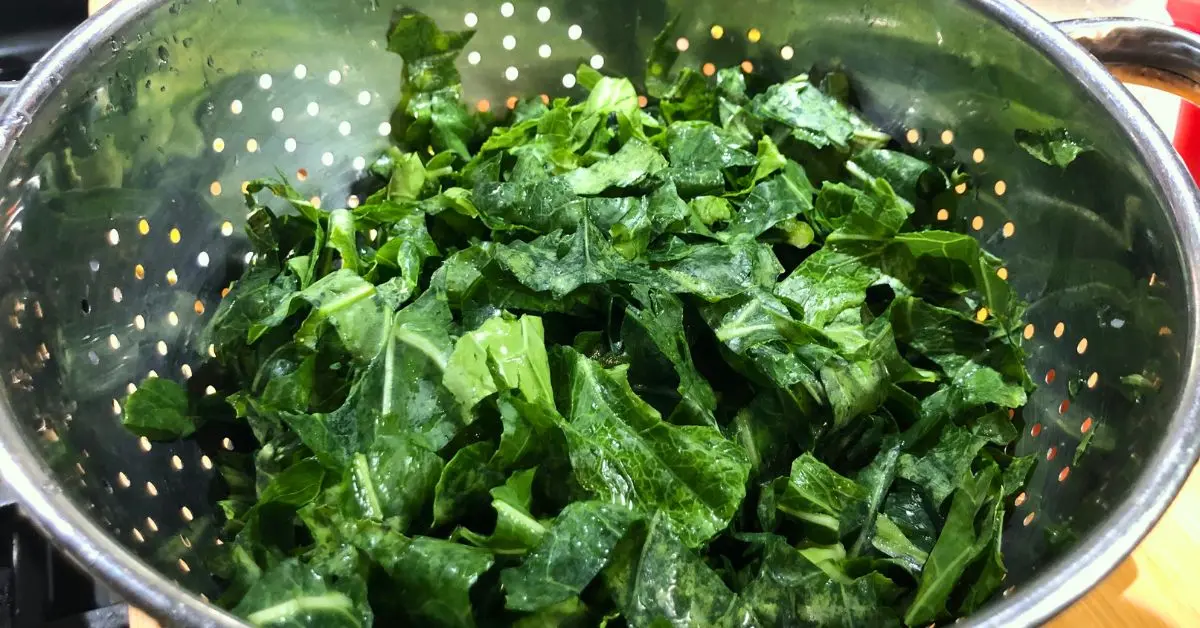
Choosing and Preparing Collard Greens
As I mentioned earlier, I actually prefer a mix of the younger, lighter collard greens and the larger, darker leaves. But when I made the video for this recipe, I used the larger, darker greens because I ordered my groceries for pickup. And, well... they gave me a bunch that was older and a little stalkier. 😂
That's real-life cooking for you.
When I'm choosing collards myself, I usually look for younger greens with smaller, lighter leaves. They're more tender and generally cook faster, which can be helpful when you don't want to spend as much time waiting for your greens to soften. They also tend to have a milder flavor than some of the larger, more mature leaves.
Younger vs. Mature Collard Greens
The size and age of your greens can make a difference in how long they take to cook.
Younger collards have smaller leaves and thinner stems, so they generally become tender more quickly. Larger, darker leaves with thicker stalks can take longer to cook.
I usually remove the bottom portion of the stalk and keep the smaller, more tender part near the leaf. If you prefer to leave more of the stalk attached, that's perfectly fine, but keep in mind that more stalk means more cooking time.
And don't worry if your bunch doesn't look exactly like mine.
A “bunch” of collards isn't a precise measurement. Some grocery stores give you a nice, full bunch while another store might hand you something considerably smaller. For this recipe, I usually use one nice-sized leafy bunch, but you can make it with one large bunch or two smaller bunches.
Just remember that if you increase the amount of greens, you'll need to adjust the other ingredients as well.
How Much Broth Do You Need?
This is one of those things I don't like to give a hard-and-fast measurement for because it really depends on your greens and how much pot likker you want.
Yes, I said pot likker in my fancy voice. 😂
If you have a larger amount of greens, you'll naturally need more broth. And if you like plenty of broth in the bottom of your pot, you'll want to add more than someone who prefers their collards with just a little liquid.
Start with less and add more as the greens cook. You can always add broth, but you can't easily take it back out.
Don't Skimp on the Broth
Since we're making these collards without meat, the broth is an important part of the flavor.
I like using a good, flavorful vegetable stock, but a nice homemade or store-bought broth works too. If you have a broth powder or seasoning base that you really like, that can work as well.
The point is simple: the broth becomes your pot likker, so make sure you actually like the flavor of the broth you're starting with.
If you want to see how I make my traditional collard greens and compare the younger and more mature greens, take a look at my Southern Collard Greens recipe. You can also use my Simple Chicken Broth when you want to use chicken stock instead of vegetable broth.
How I Like My Collards
Normally, I like my collard greens to stay fairly whole. I want them tender, but I absolutely reject soggy, mushy greens. 😂
But for this particular meatless version, I actually like chopping the greens a little smaller.
Why?
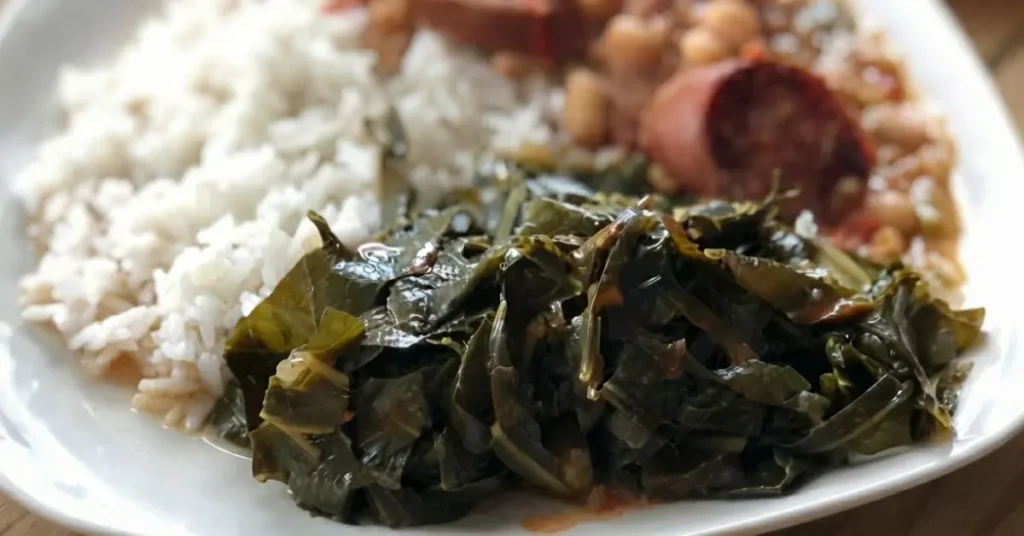
Because I'm usually putting these collards on the same plate as my beans and rice, and yes, I'm one of those people who mixes my food together. My food can touch my plate. I said what I said. 😂
Chopped collards make it easy to get a little bit of everything in one bite, especially when I'm serving them with my Southern pinto beans or another pot of beans and rice.
Of course, how you cut and cook your greens is completely up to you. If you like your collards larger and more intact, keep them that way. If you like them chopped smaller, go for it.
The important thing is cooking them until they're tender enough for you, without taking them all the way to mush.
🌿 Pro-Tips for Better Meatless Greens
Remember, because we're skipping the smoked meat, every single layer counts! Don't rush your aromatics, and give those spices a chance to bloom in the oil before the broth goes in. If your pot likker needs a little extra depth at the end, trust your palate and adjust your vinegar, Worcestershire, or salt until it sings.
Tips and Tricks for Better Meatless Collard Greens
Now let’s talk about adjustments, because it is perfectly okay to adjust a recipe. 😂
A recipe is a starting point, but your tongue is the judge. It knows what you like, so taste your greens as they cook and make adjustments along the way. These are some of the little things I pay attention to when I’m making this pot.
Want More Spice Without Making Them Hot?
There’s a difference between spicy and hot, and I like my collards to have a little warm tingle without setting my mouth on fire. 😂
If you want the red pepper flakes to have more presence, sauté them right along with the onions and garlic in the oil. The oil helps infuse their flavor throughout the pot, giving you a warmer, more noticeable spice.
If you want the pepper flavor to be more subdued, add the red pepper flakes to the broth instead. You’ll still get some heat, but it will be softer and less infused throughout the greens.
Layer Your Flavor
Yes, we’re already using fresh onion and garlic, but I also like to add just a little onion powder and garlic powder.
Why? Layered flavor.
The fresh onion and garlic give you that fresh aromatic flavor, while the powders add another little layer underneath it. You don't need a lot. We aren't trying to make onion and garlic-flavored collard greens. 😂 All those flavors should come together and meld into the pot.
And remember, the fresher your dried spices are, the better they’ll taste. If that bottle of garlic powder has been sitting in your cabinet since who knows when, it may be time for a little spice cabinet cleanup.
Go Easy on the Worcestershire Sauce
I love Worcestershire sauce, but this is one ingredient where I recommend starting small and building as you taste.
It adds a wonderful savory depth to the pot, but it can take over pretty quickly if you get heavy-handed. It also contains salt, so I recommend waiting to add your final salt until the greens have cooked for a while and you've tasted the pot likker.
Add a little, let it cook, taste, and then decide if you want more. Your tongue gets the final vote.
No Worcestershire Sauce? You Have Options.
If you don't have Worcestershire sauce, you can simply leave it out. You can also use a little soy sauce for some of that savory, salty depth.
And if you're wondering why Worcestershire sauce isn't always vegetarian or vegan, traditional Worcestershire sauce contains anchovies. Yep, those tiny little fish. 😂
Oooop! Did I just let out the secret?
If you're vegan or avoiding fish, look for a vegan Worcestershire-style sauce instead. There are versions made without anchovies.
Apple Cider Vinegar Brightens Everything Up
For me, apple cider vinegar is a finisher. It brightens up the flavor and gives the greens that little something that wakes the whole pot up.
I don't want my collards to taste like vinegar, though. If you do, that's perfectly fine! Just increase the amount to suit your taste.
You can add some while the greens are cooking and then add a little more toward the end if you want a brighter finish. I usually prefer to taste first and then decide how much more the pot needs.
And if you're using a little soy sauce in place of the Worcestershire sauce, a touch of apple cider vinegar can help round things out nicely.
And Don't Forget the Sugar
Just a tad of sugar can help balance the natural bitterness of collard greens. We're not making sweet greens. 😂
The amount you need can depend on the greens you're using. Younger greens may need less, while larger, more mature greens can sometimes benefit from that little bit of balance.
Start with a small amount, let everything cook together, and taste. Again, your tongue knows what it likes.
How to Make Meatless Collard Greens
1. Start with the Aromatics
Heat the oil in a large pot over medium heat. Add the finely diced onion and red pepper flakes and sauté until the onion begins to soften. Add the garlic and continue cooking until fragrant.
I like taking a little time with this step because we're building the flavor from the very beginning. You don't want to rush those aromatics.
2. Sauté the Collard Greens
Add the chopped collard greens to the pot along with the onion powder, garlic powder, smoked paprika, and thyme. Toss everything together and let the greens sauté with the aromatics for several minutes.
As the greens cook, they'll begin to wilt and release some moisture. This little bit of sautéing adds another layer of flavor before we introduce the broth.
3. Add the Broth and Seasonings
Once the greens have started to cook down, add the Worcestershire sauce, sugar, bay leaf, and apple cider vinegar. Then add your broth.
Here's where you need to use your judgment.
The amount of broth you need can depend on the size of your pot, how many greens are in your bunch, and how much pot likker you like. Some bunches are much larger than others, so don't feel like you have to pour in a specific amount just because the recipe says so.
Start with enough broth to give the greens plenty of moisture without completely drowning them. You can always add more as they cook.
If you love plenty of pot likker for spooning over your greens — or, let's be honest, sipping from the spoon — add a little more broth.
4. Simmer Until Tender
Bring everything to a gentle boil, then reduce the heat, cover, and let the collards simmer until they reach the texture you like.
For younger, more tender greens, this may take less time. Larger or more mature greens can take considerably longer.
I prefer my collards tender and silky, but not completely falling apart. Start checking them around 35 minutes, but don't be afraid to let them cook longer if they need it.
Give them a stir every so often and check the liquid. If the pot is getting too dry, add a little more broth.
5. Taste and Finish
Once the greens are tender, remove the bay leaf and taste the pot likker.
This is the time to make the recipe your own. You may want a little more Worcestershire for savory depth, another pinch of sugar if the greens are particularly bitter, or more apple cider vinegar if you prefer a brighter, more vinegary flavor.
Remember, your bunch of greens may be different from mine, so tasting and adjusting is part of cooking a good pot of collards.
Meatless Collard Greens
Ingredients
- 1-2 bunches collard greens washed, stems removed, cut into ribbons
- 1 medium onion chopped
- 3-4 cloves minced garlic minced
- 2 tbsp olive oil or butter
- 3 cups vegetable broth or water + bouillon
- ½ tsp smoked paprika
- ½ tsp onion powder
- ½ tsp garlic powder
- 1 tsp sugar
- 1/2 -1 tbsp Worcestershire sauce
- 1-2 tsp apple cider vinegar added while cooking
- 1 bay leaf
- ½ tsp dried thyme or 2–3 sprigs fresh thyme
- ¼-½ red pepper flakes added while cooking
- Salt & black pepper to taste
Instructions
- Sauté base: Heat oil in a large pot over medium. Cook onion until soft (~5 minutes). Add fresh garlic and cook until fragrant.
- Layer flavors: Add collards, smoked paprika, onion powder, garlic powder, thyme, red pepper flakes, and vinegar. Toss until greens begin to wilt.
- Simmer: Pour in broth, Worcestershire, and sugar. Add bay leaf. Bring to a boil, then reduce to a gentle simmer. Cover and cook 35–45 minutes, stirring occasionally. Add more broth if needed to keep some pot likker.
- Remove bay leaf and taste. Finish with apple cider vinegar. Adjust salt, pepper, or Worcestershire as needed.
- Serve fresh: Optionally drizzle with olive oil or butter. Add any toppings you like.
Notes
- Greens vary in size: Cooking time may vary depending on the size and maturity of your collard greens. Cook until they reach the tenderness you like.
- Broth is flexible: Start with less broth and add more as needed, depending on how many greens you have and how much pot likker you want.
- Adjust the heat: For a warmer, more infused spice, sauté the red pepper flakes with the onions and garlic. For milder heat, add them to the broth instead.
- Taste before adding salt: Worcestershire sauce and broth can both contain salt, so taste the greens after they have cooked before adding additional salt.
- Make them your own: Adjust the Worcestershire sauce, apple cider vinegar, sugar, and red pepper flakes to your taste.
Got Questions? Dana’s Kitchen Answers
Can I make meatless collard greens ahead of time?
Absolutely. Collard greens are a great make-ahead dish, and I think they can taste even better after the flavors have had time to come together. Make them a day ahead, refrigerate them, and gently reheat them on the stovetop with a splash of broth if they need more liquid.
How do I store leftover collard greens?
Let the greens cool and transfer them to an airtight container. Store them in the refrigerator for 3 to 4 days, keeping some of that good pot likker with them so they stay moist and flavorful when reheated.
Can I freeze meatless collard greens?
Yes, collard greens freeze very well. Let them cool completely, then portion them into freezer-safe containers or bags, including some of the pot likker with each portion. For the best quality, use frozen greens within about 2 to 3 months.
How do I reheat frozen collard greens?
Thaw them overnight in the refrigerator and reheat them gently on the stovetop. You can also reheat them from frozen in a covered saucepan over low to medium-low heat, adding a little broth or water if needed.
Will the texture change after freezing?
It can soften a little after freezing and reheating, which is another reason I like to cook my greens until they are tender but not mushy. They should still hold together nicely instead of falling apart.
Can I freeze the greens with the pot likker?
Yes, and I recommend it. The pot likker helps keep the greens moist while they freeze and reheat, and you definitely don't want to waste all that flavor. If you've got plenty of that sippable pot likker, keep it!
A Pot of Greens for More Than Just the Holidays
And there you have it, a good pot of meatless collard greens that doesn't skimp on flavor. You don't need smoked meat to make greens worth coming back for. With a little layering, a good broth, and a pot of greens cooked until tender, you can still have plenty of flavor in every bite.
And please don't forget the good ole Southern cornbread. You need something to soak up that pot likker, and cornbread is just the ticket.
These collard greens make the perfect side for just about anything, from beans and rice to your favorite Sunday dinner. And don't save them for Thanksgiving or Christmas either. Collards aren't just for the holidays. They deserve a place at the table any time you're craving a good plate of comfort food.
So grab yourself a pot, get those greens cooking, and don't forget to taste along the way. Your tongue knows what it likes. 😂

Hey good people, if you gave these meatless collard greens a try, please drop a comment below and let me know how they turned out!
Did you turn up the red pepper flakes, add a little more Worcestershire, or make yourself a big ole batch of pot likker? I love hearing how you make these recipes your own, and your feedback can help other home cooks decide what works best for them.
⭐ To rate this recipe, just click the stars below. I’d be so grateful if you hit that 5th star for a perfect review!